Creative Choreography for your Second Level Musical Freestyle
Are you ready to bring your Second Level freestyle to life? Designing choreography at this stage can feel both exciting and overwhelming—there are more movements to include, more creativity to play with, and more opportunities to showcase your horse. 🎶
These choreography tips will give you a solid starting point to build a freestyle that is clear, flowing, and judge-friendly.
Sandra runs through all the required movements - Medium Trot and Canter, Shoulder-In, and Simple Changes to name a few!

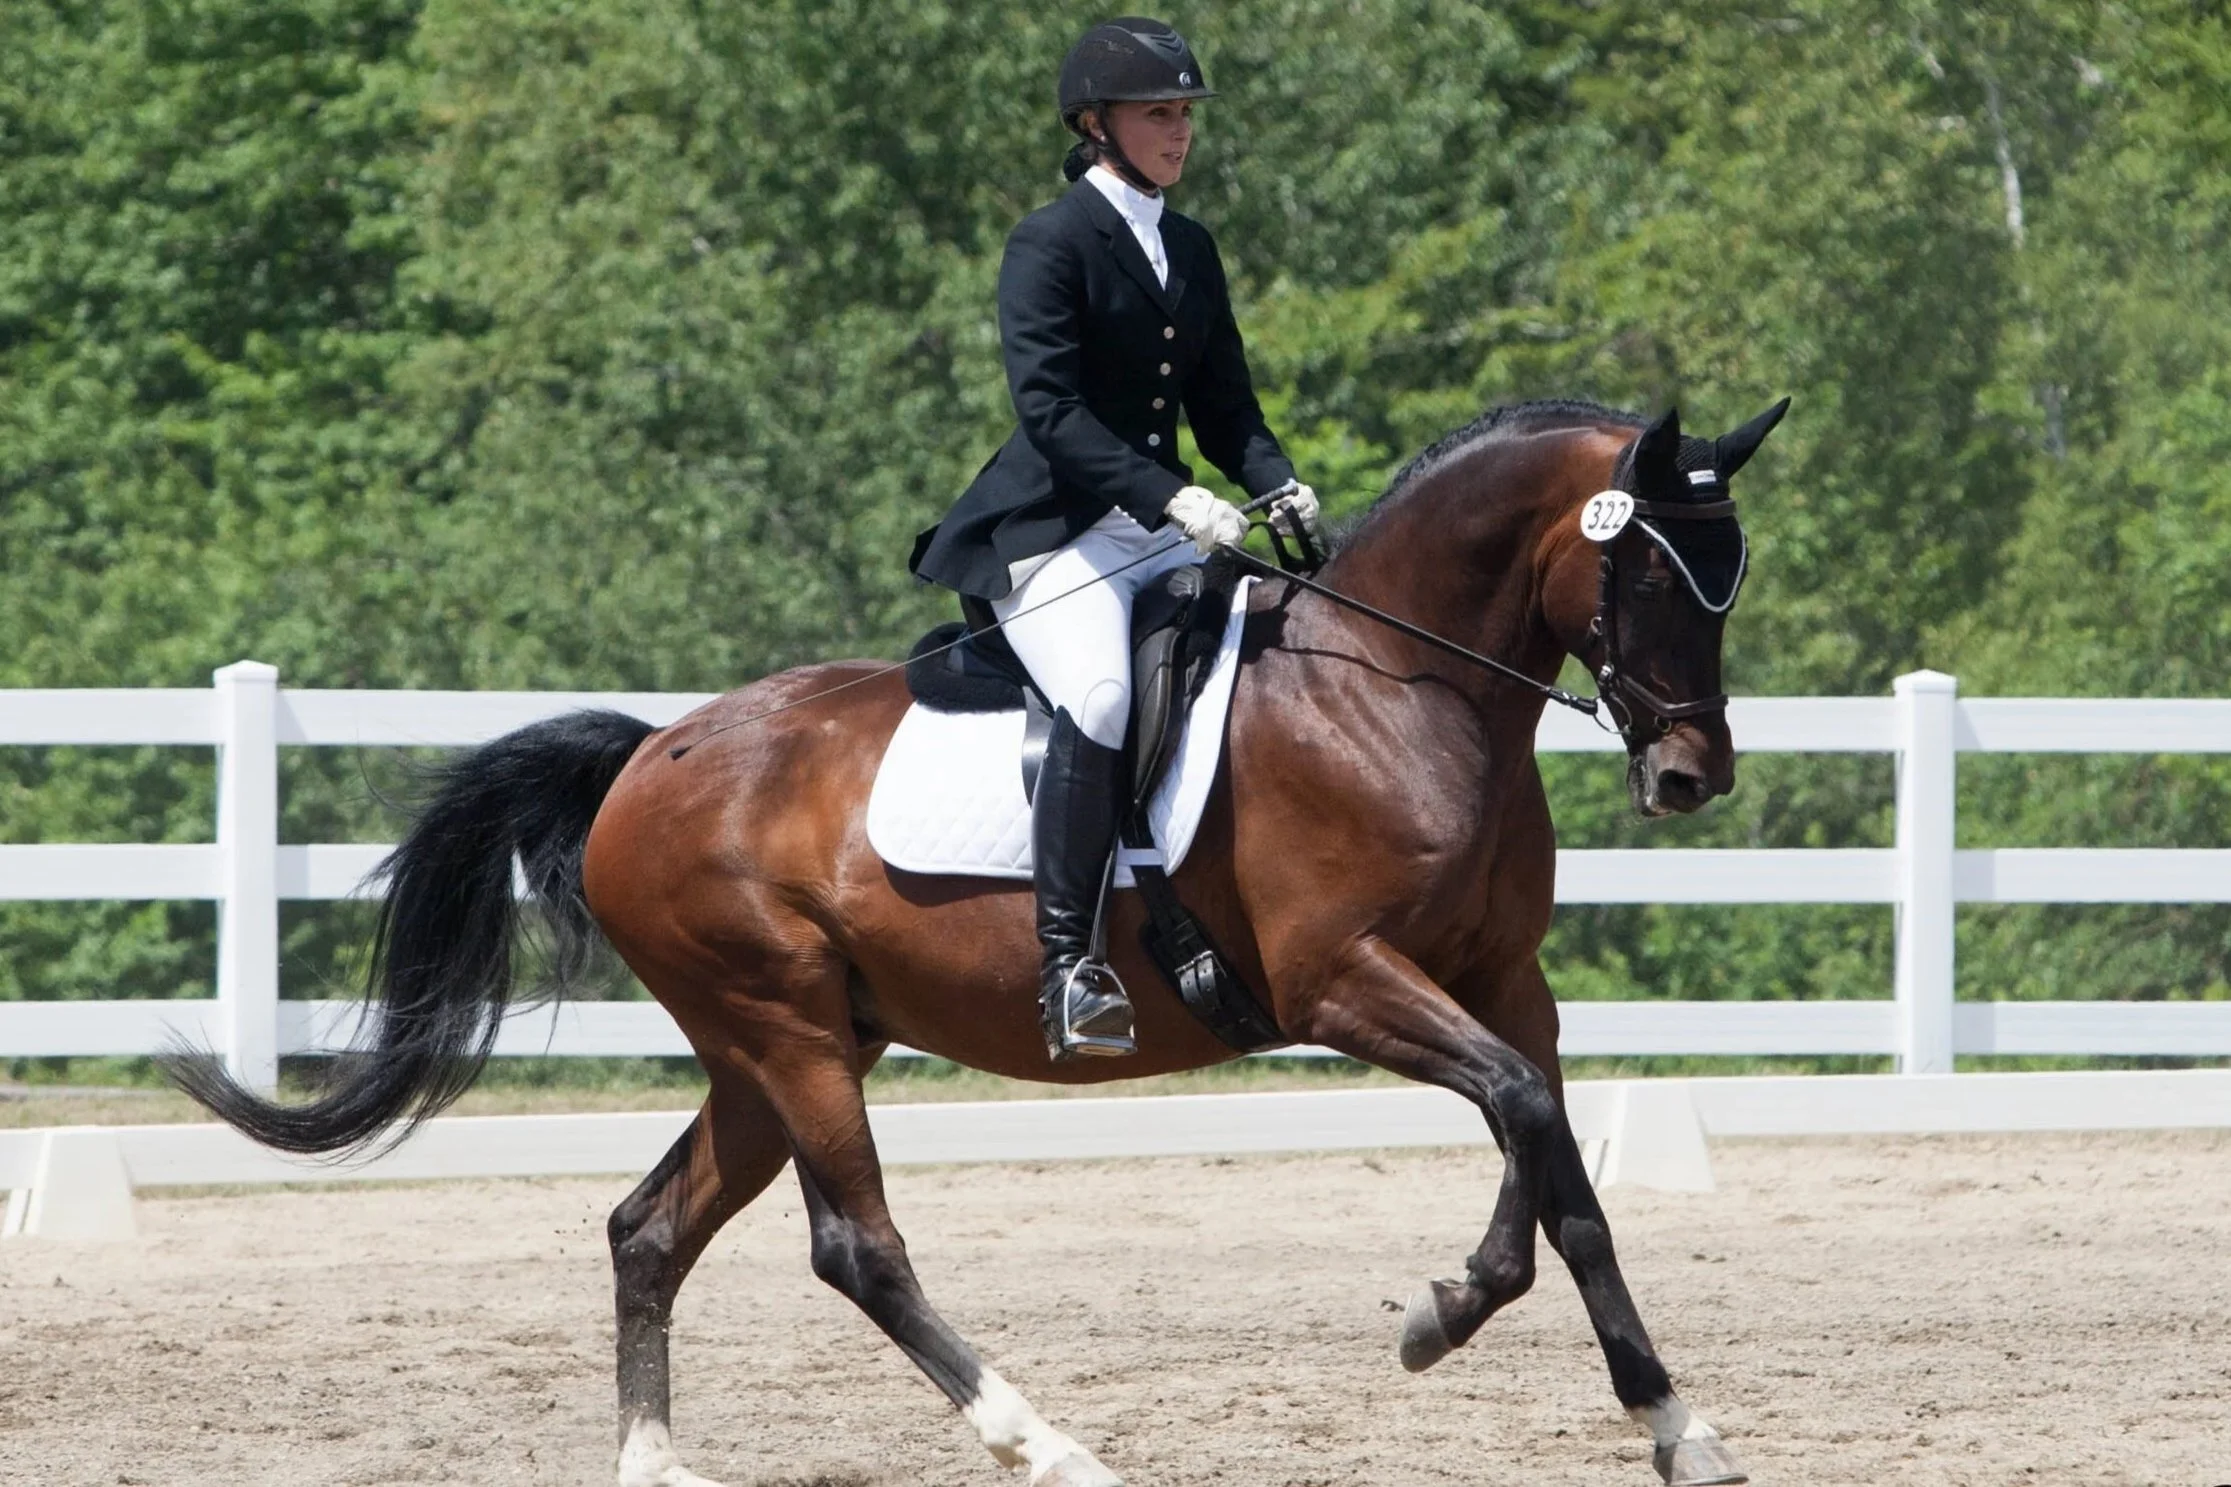
Sandra and Rovandio ride a Second level Freestyle. Spotted Vision Photography
Are you ready to bring your Second Level freestyle to life? Designing choreography at this stage can feel both exciting and overwhelming—there are more movements to include, more creativity to play with, and more opportunities to showcase your horse. 🎶
These choreography tips will give you a solid starting point to build a freestyle that is clear, flowing, and judge-friendly.
You’ll also get a taste of what’s inside my Second Level Choreography E-Book, which is packed with even more inspiration for designing patterns that highlight your horse’s strengths. ⭐️
Simplicity = Confidence
A common mistake in freestyle design is making the pattern too complicated. Your movements should be easy for the judge to see —if they can’t tell what movement you are riding, your scores can suffer. Focus on precision over complexity.
Prioritize technical execution first, and design your choreography to set your horse up for success in every required movement. Remember, the degree of difficulty is just ONE score.
Medium Trot
At Second Level you are required to show one Medium Trot on a straight line. Typically, riders will include more than one.
👉🏼 Keep in mind that you MUST show your medium trot on a straight line! If you use a curved/bending line it will ONLY be counted towards your Artistic marks.
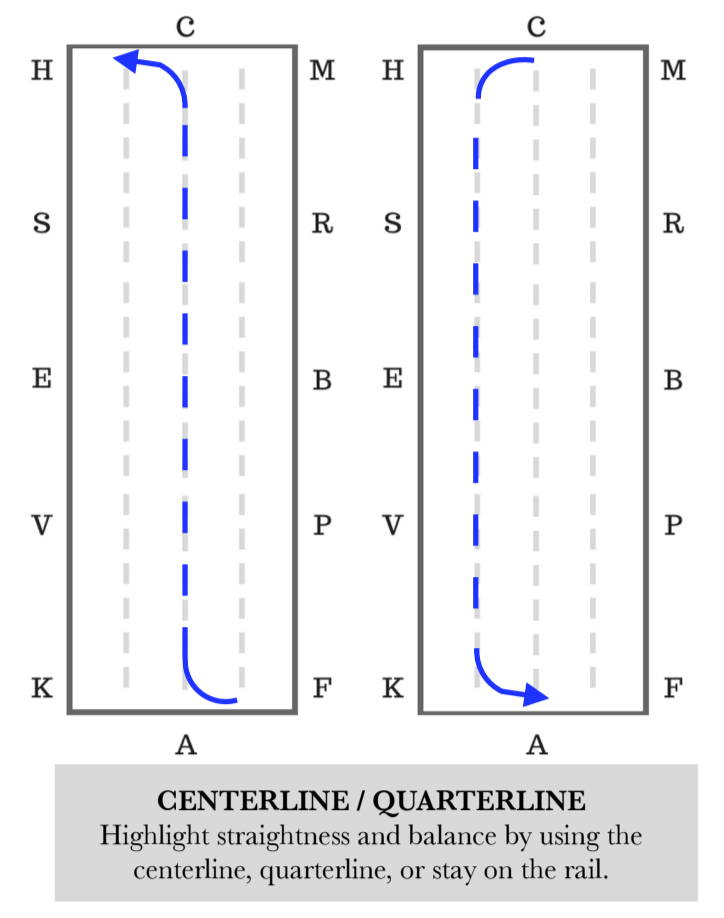
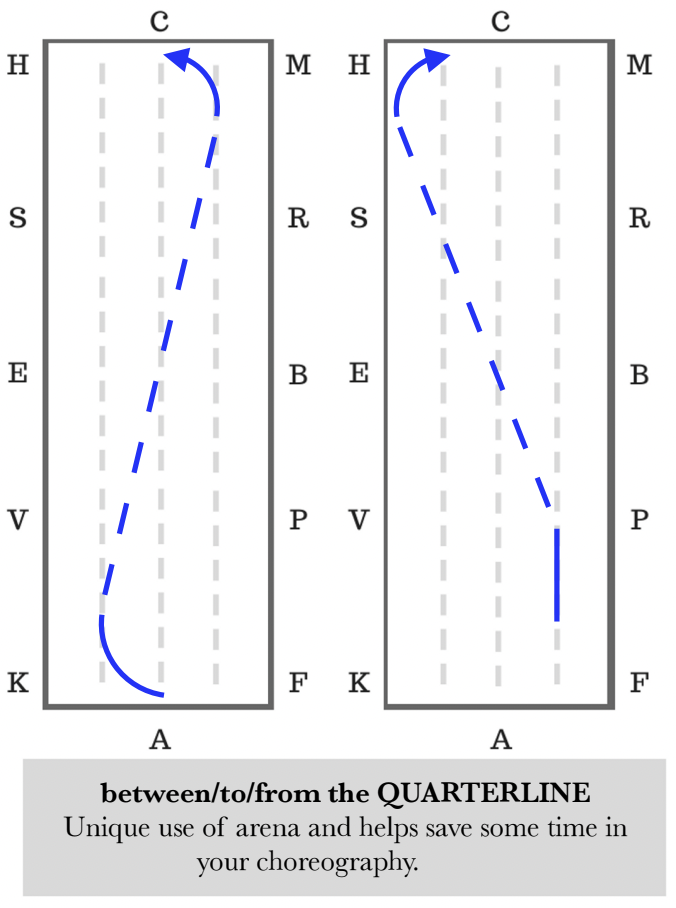
Use your quarterline(s) and centerline to highlight your horse’s straightness and balance. (diagram)
Angle your lengthening on a diagonal line from the centerline to the rail so that your diagonal line is less test-like.
Incorporate walk or canter transitions before/after your medium trot to demonstrate ride-ability.

Shoulder-In
At Second Level you are required to ride a Shoulder-In in BOTH directions with a minimum distance of 12 meters.
Use your quarterline(s) and/or centerline if you horse has a consistent angle and bend.
Use your shoulder-in to set up for a medium trot or use a medium trot first to add energy. (diagram)
Incorporate unique transitions such as shoulder-in to canter on a circle or leading into the counter canter.

Travers (Haunches-In)
At Second Level you are required to show a Travers in both directions with a minimum of 12 meters. A Renvers will count towards your Travers score.
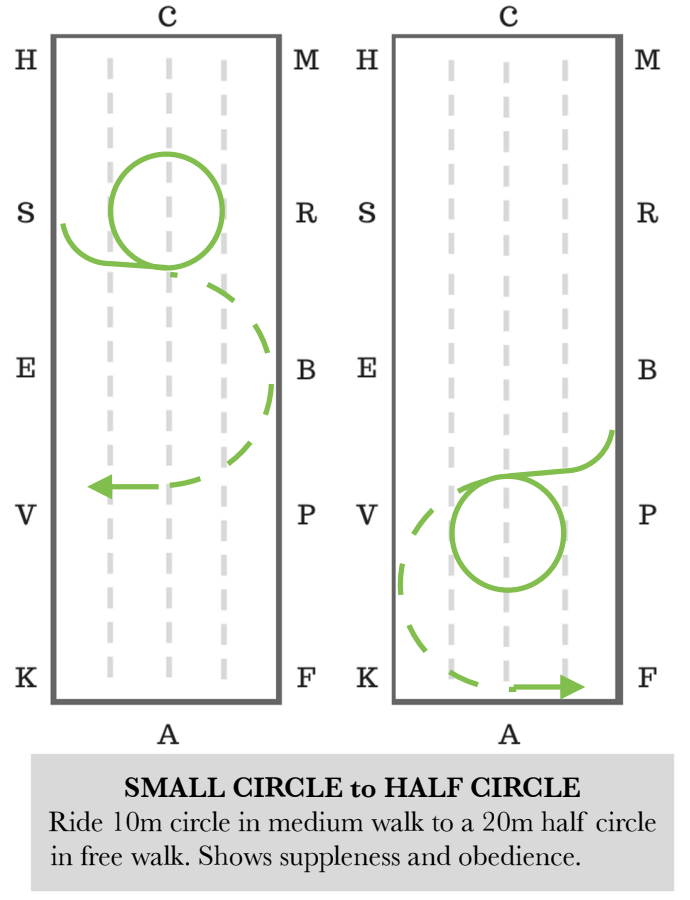
Place a 10 meter circle before/after if it will help setup the bend/balance for your horse. (diagram)
Ride your travers back to back for higher degree of difficulty. Use the centerline for maximum points if your horse shines in this movement.
Use your quarterlines so that you have added flexibility if you get ahead/behind the music.
Medium & Free Walk
At Second Level you are required to show a minimum of 20 meters of medium walk and free walk. You are allowed to ride them on curved lines.
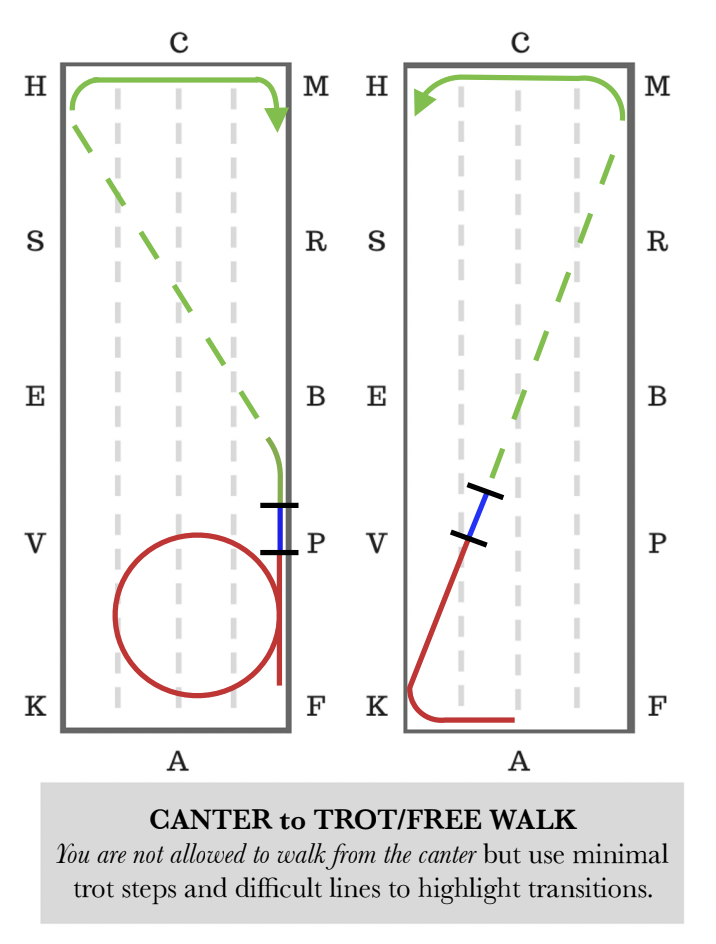
Going from the the trot directly into the free walk is more difficult than using the medium walk for the transition.
Highlight an amazing walk by using diagonal lines, half circles, or bending lines where the judge can clearly see the overstep and rhythm.
If your horse has poor rhythm you can showcase straightness by riding your medium or free walk on the centerline/quarterline or suppleness with a unique bending line to challenge your horse’s ability to relax and focus. (diagram)

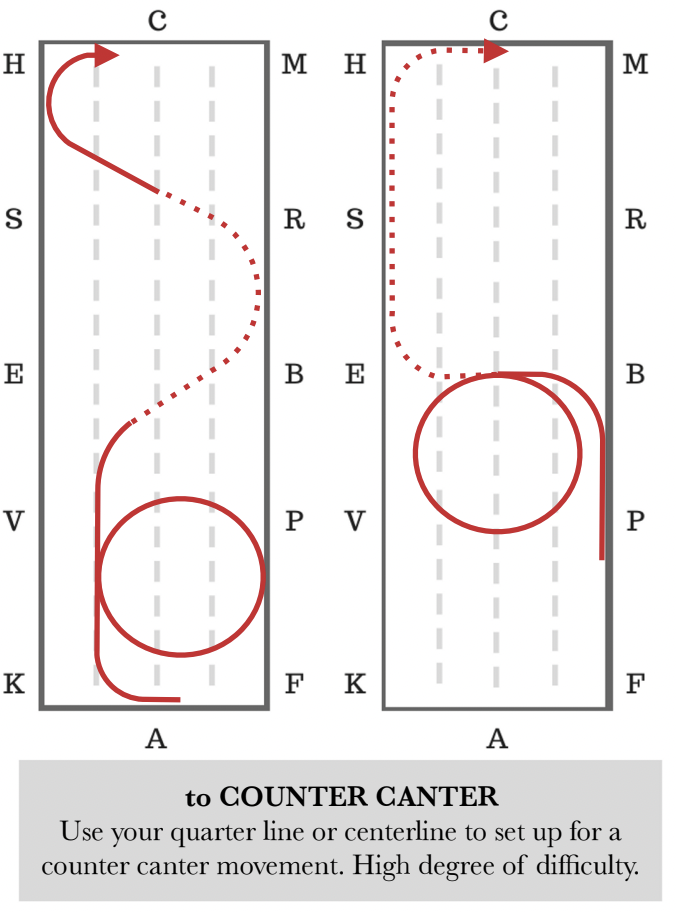
Counter Canter
At Second Level you are required to show counter canter on BOTH leads. There is no required distance but make sure that it is really clear for the judge.
Use your quarterlines for added interest and degree of difficulty. (diagram)
Ride counter canter into/out of a medium canter on the diagonal to help with balance and energy.
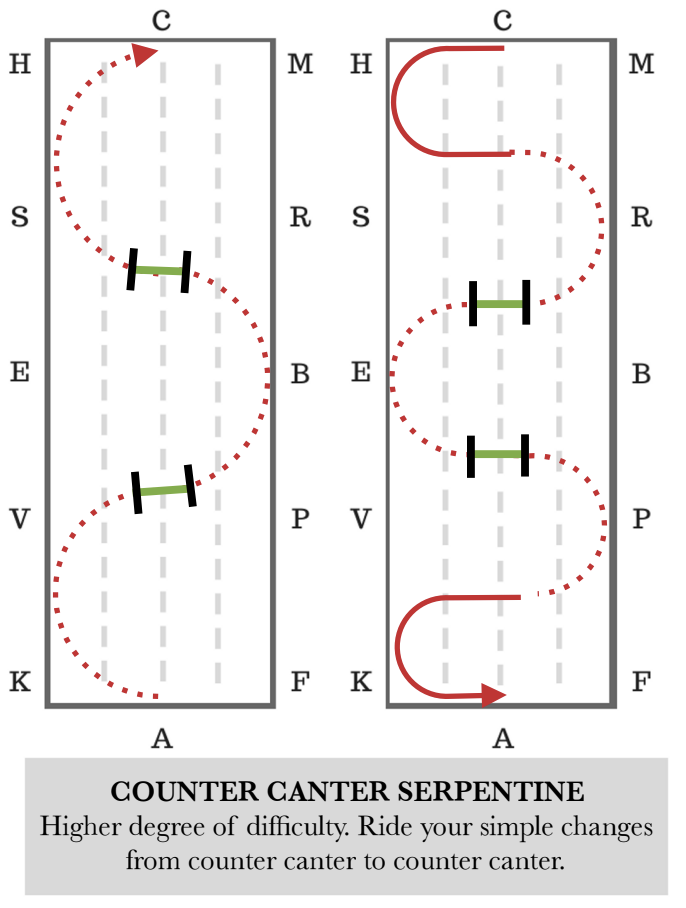
Incorporate serpentine loops and half or full 20 meter circles for flow and difficulty.
Simple Changes
At Second Level you are required to show a simple change (canter-walk-canter) in both directions.
Use your centerline and quarterlines to demonstrate straightness and ride-ability. This can also save on time and help you flow into your next movement.
Incorporate counter canter before/after if your horse has reliable simple changes. (diagram)
Include additional simple changes to give you a second opportunity. You will typically see riders ride two simple changes in each direction.

Medium Canter
At Second Level you are required to show one medium canter on a straight line.
👉🏼 Keep in mind that you MUST show your medium canter on a straight line! If you use a curved/bending line it will ONLY be counted towards your Artistic marks.
Include counter canter before/after your medium canter to showcase balance and obedience. (diagram)
Use your centerlines and quarterlines if you horse is well balanced and straight.
Angle your medium canter on a diagonal line from the centerline to the rail so that you can stay on the same lead.
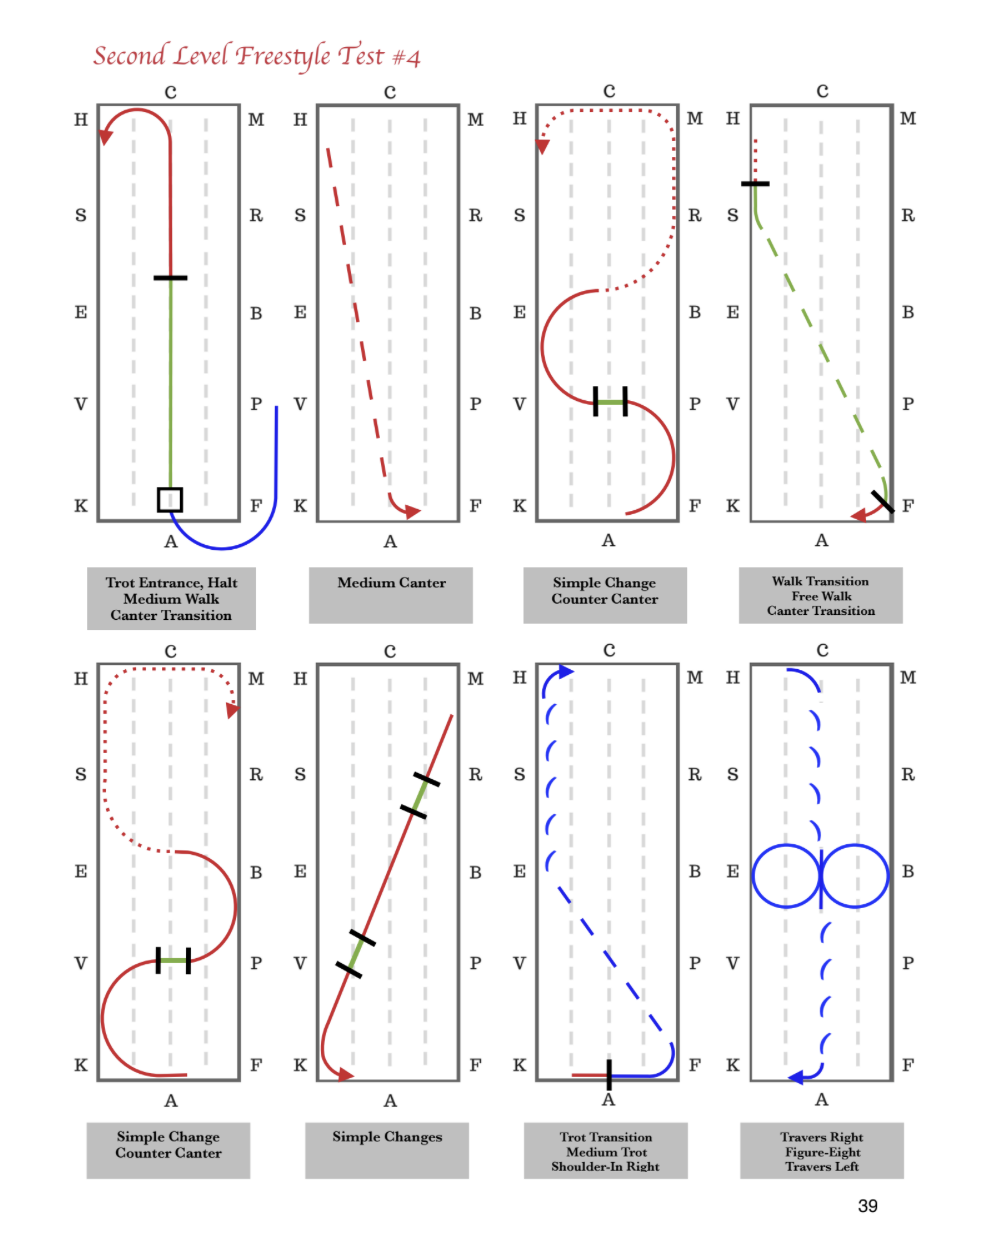
Sample Choreography
Here is a sample freestyle pattern that would meet all the requirements for Second Level. This is included in my Choreography e-Book along with 9 other pre-made routines for you to use or take bits and pieces from.
I hope this helped you generate some ideas for your Second Level freestyle! If you have any questions or comments feel free to email me at beginthedance@gmail.com. 😊

Download My Free Resources
Helpful worksheets, checklists, and my favorite apps/resources to help you get started on your musical freestyle today! 🎶
Browse my Freestyle Book Store
Learn how to create a musical freestyle from start to finish or choose an e-Book with choreography ideas just for your level.
Click here to view all Freestyle Books & e-Books.


Related Articles


Creative Choreography for your First Level Dressage Musical Freestyle

Douwe competing a First level Freestyle. Spotted Vision Photography
Are you putting together a First Level dressage freestyle? Congratulations! In this article I will share choreography tips specifically meant for First Level. I have broken them down by each required movement.
This is a sampling of what is included in my First Level Choreography E-Book.
Overall Tips to Keep in Mind
In regards to degree of difficulty, keep in mind that you want your freestyle routine to be easy for the judge to follow along. Don’t make it so complicated that the judge is confused or they cannot tell what movement you are riding.
Choose variations of each movement so that your horse can perform to the best of their ability. Do not overface your horse and lose technical points.
Trot Lengthening
At First Level you are required to show one trot lengthening on a straight line. Typically riders will include more than one.
Use your quarterlines and centerline to highlight your horse’s straightness and balance.
Angle your lengthening on a diagonal line from the centerline to the rail so that your diagonal line is less test-like. (shown in diagram)
Incorporate walk or canter transitions close to your trot lenghthening to demonstrate ride-ability.
10 meter Trot Circles
At First Level you are required to show a 10 meter trot circle in both directions.
Approach your circles from the quarterline, centerline, or parallel to the short sides so that it is placed differently than a dressage test.
Ride your circle immediately before/after other movements like leg-yield and lengthened trot to showcase ride-ability.
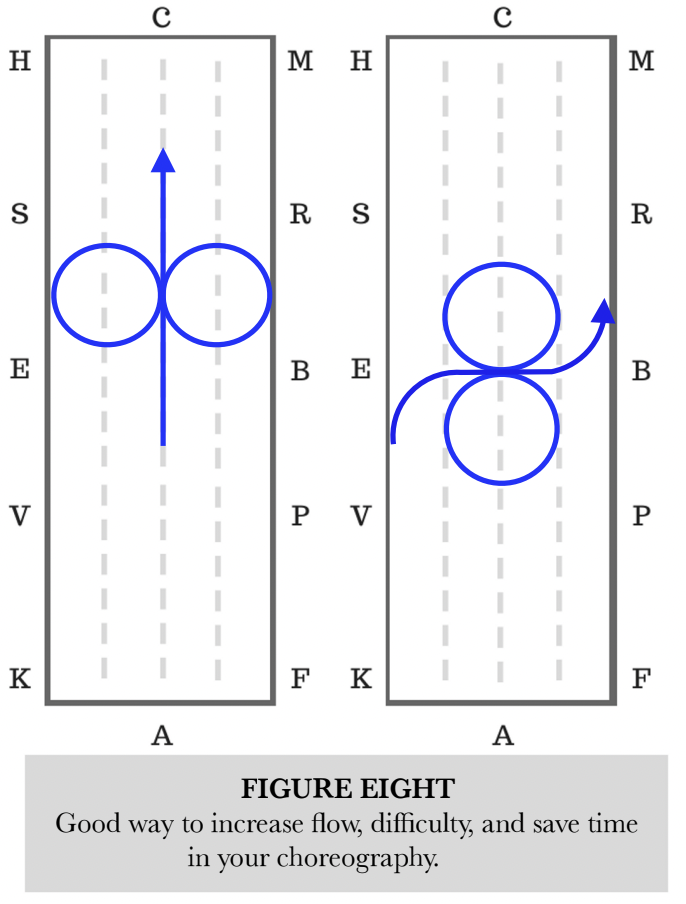
Ride a figure-eight with your two trot circles to demonstrate suppleness.
Place your circle before/after a canter transition to showcase your horse’s ability to maintain his/her balance.
Medium & Free Walk
At First Level you are required to show a minimum of 20 meters of medium walk and free walk. You are allowed to ride them on curved lines.
Going from the the trot directly into the free walk is more difficult than using the medium walk for the transition.
Highlight an amazing walk by using diagonal lines, half circles, or bending lines where the judge can clearly see the overstep and rhythm.
If your horse has poor rhythm you can showcase straightness by riding your medium or free walk on the centerline/quarterline or suppleness with a unique bending line to challenge your horse’s ability to relax and focus.

Trot Leg-Yield
At First Level you are required to show a leg-yield in both directions with a minimum of 12 meters.
Incorporate a leg-yield zig-zag if your horse can stay straight and steady. Keep in mind that you want to choose movements that your horse can perform well consistently.
Ride canter transitions or lengthened trot before/after leg-yield to showcase ride-ability.
Place your trot circles before/after to help setup the bend and balance your horse.
15 meter Canter Circles
At First Level you are required to show a 15 meter canter circle in both directions.
Use your quarterlines to begin your circle, this helps with your accuracy and improves degree of difficulty riding off the track.
Place your lengthened canter directly before/after your circle to highlight good impulsion.
Include counter canter before/after your circles to showcase balance and obedience.

Changes of Lead Through Trot
At First Level you are required to show a change of lead through trot (canter - trot - canter) in both directions.
Use your centerline and quarterlines to demonstrate straightness and ride-ability. This can also save on time and help you flow into your next movement.
Incorporate counter canter before/after if your horse has reliable changes of lead.
Include additional changes of lead in case you mess up on one of them. You will typically see riders include two in each directions.

Canter Lengthening
At First Level you are required to show one canter lengthening on a straight line. Typically, riders will include at two canter lengthenings.
Use your centerlines and quarterlines if you horse is well balanced and straight.
Include counter canter before/after your lengthening to showcase balance and obedience.
Angle your lengthening on a diagonal line from the centerline to the rail so that you can stay on the same lead. (shown in diagram)
I hope this article helps you with some ideas for your First Level freestyle! In general try to create a pattern that helps your horse perform with confidence and score well in your technical marks.
Click here if you want to take a closer look at my choreography e-books where these particular diagrams come from. If you have any questions please send me an email at beginthedance@gmail.com.
Download My Free Resources
Helpful worksheets, checklists, and my favorite apps/resources to help you get started on your musical freestyle today!
Browse my Freestyle Book Store
Learn how to create a musical freestyle from start to finish or choose an e-Book with choreography ideas just for your level.
Click here to view all Freestyle Books & e-Books.

Related Articles
Are you ready to bring your Second Level freestyle to life? Designing choreography at this stage can feel both exciting and overwhelming—there are more movements to include, more creativity to play with, and more opportunities to showcase your horse. 🎶
These choreography tips will give you a solid starting point to build a freestyle that is clear, flowing, and judge-friendly.
Sandra runs through all the required movements - Medium Trot and Canter, Shoulder-In, and Simple Changes to name a few!